
*This post may contain affiliate links. As an Amazon Associate we earn from qualifying purchases.
Dive gear is your lifeline when exploring the underwater world. It’s your ticket to an amazing adventure beneath the waves, but it’s also a significant investment. That’s why cleaning dive gear is so important. It’s not just about keeping your equipment looking good; it’s about ensuring its longevity and your safety.
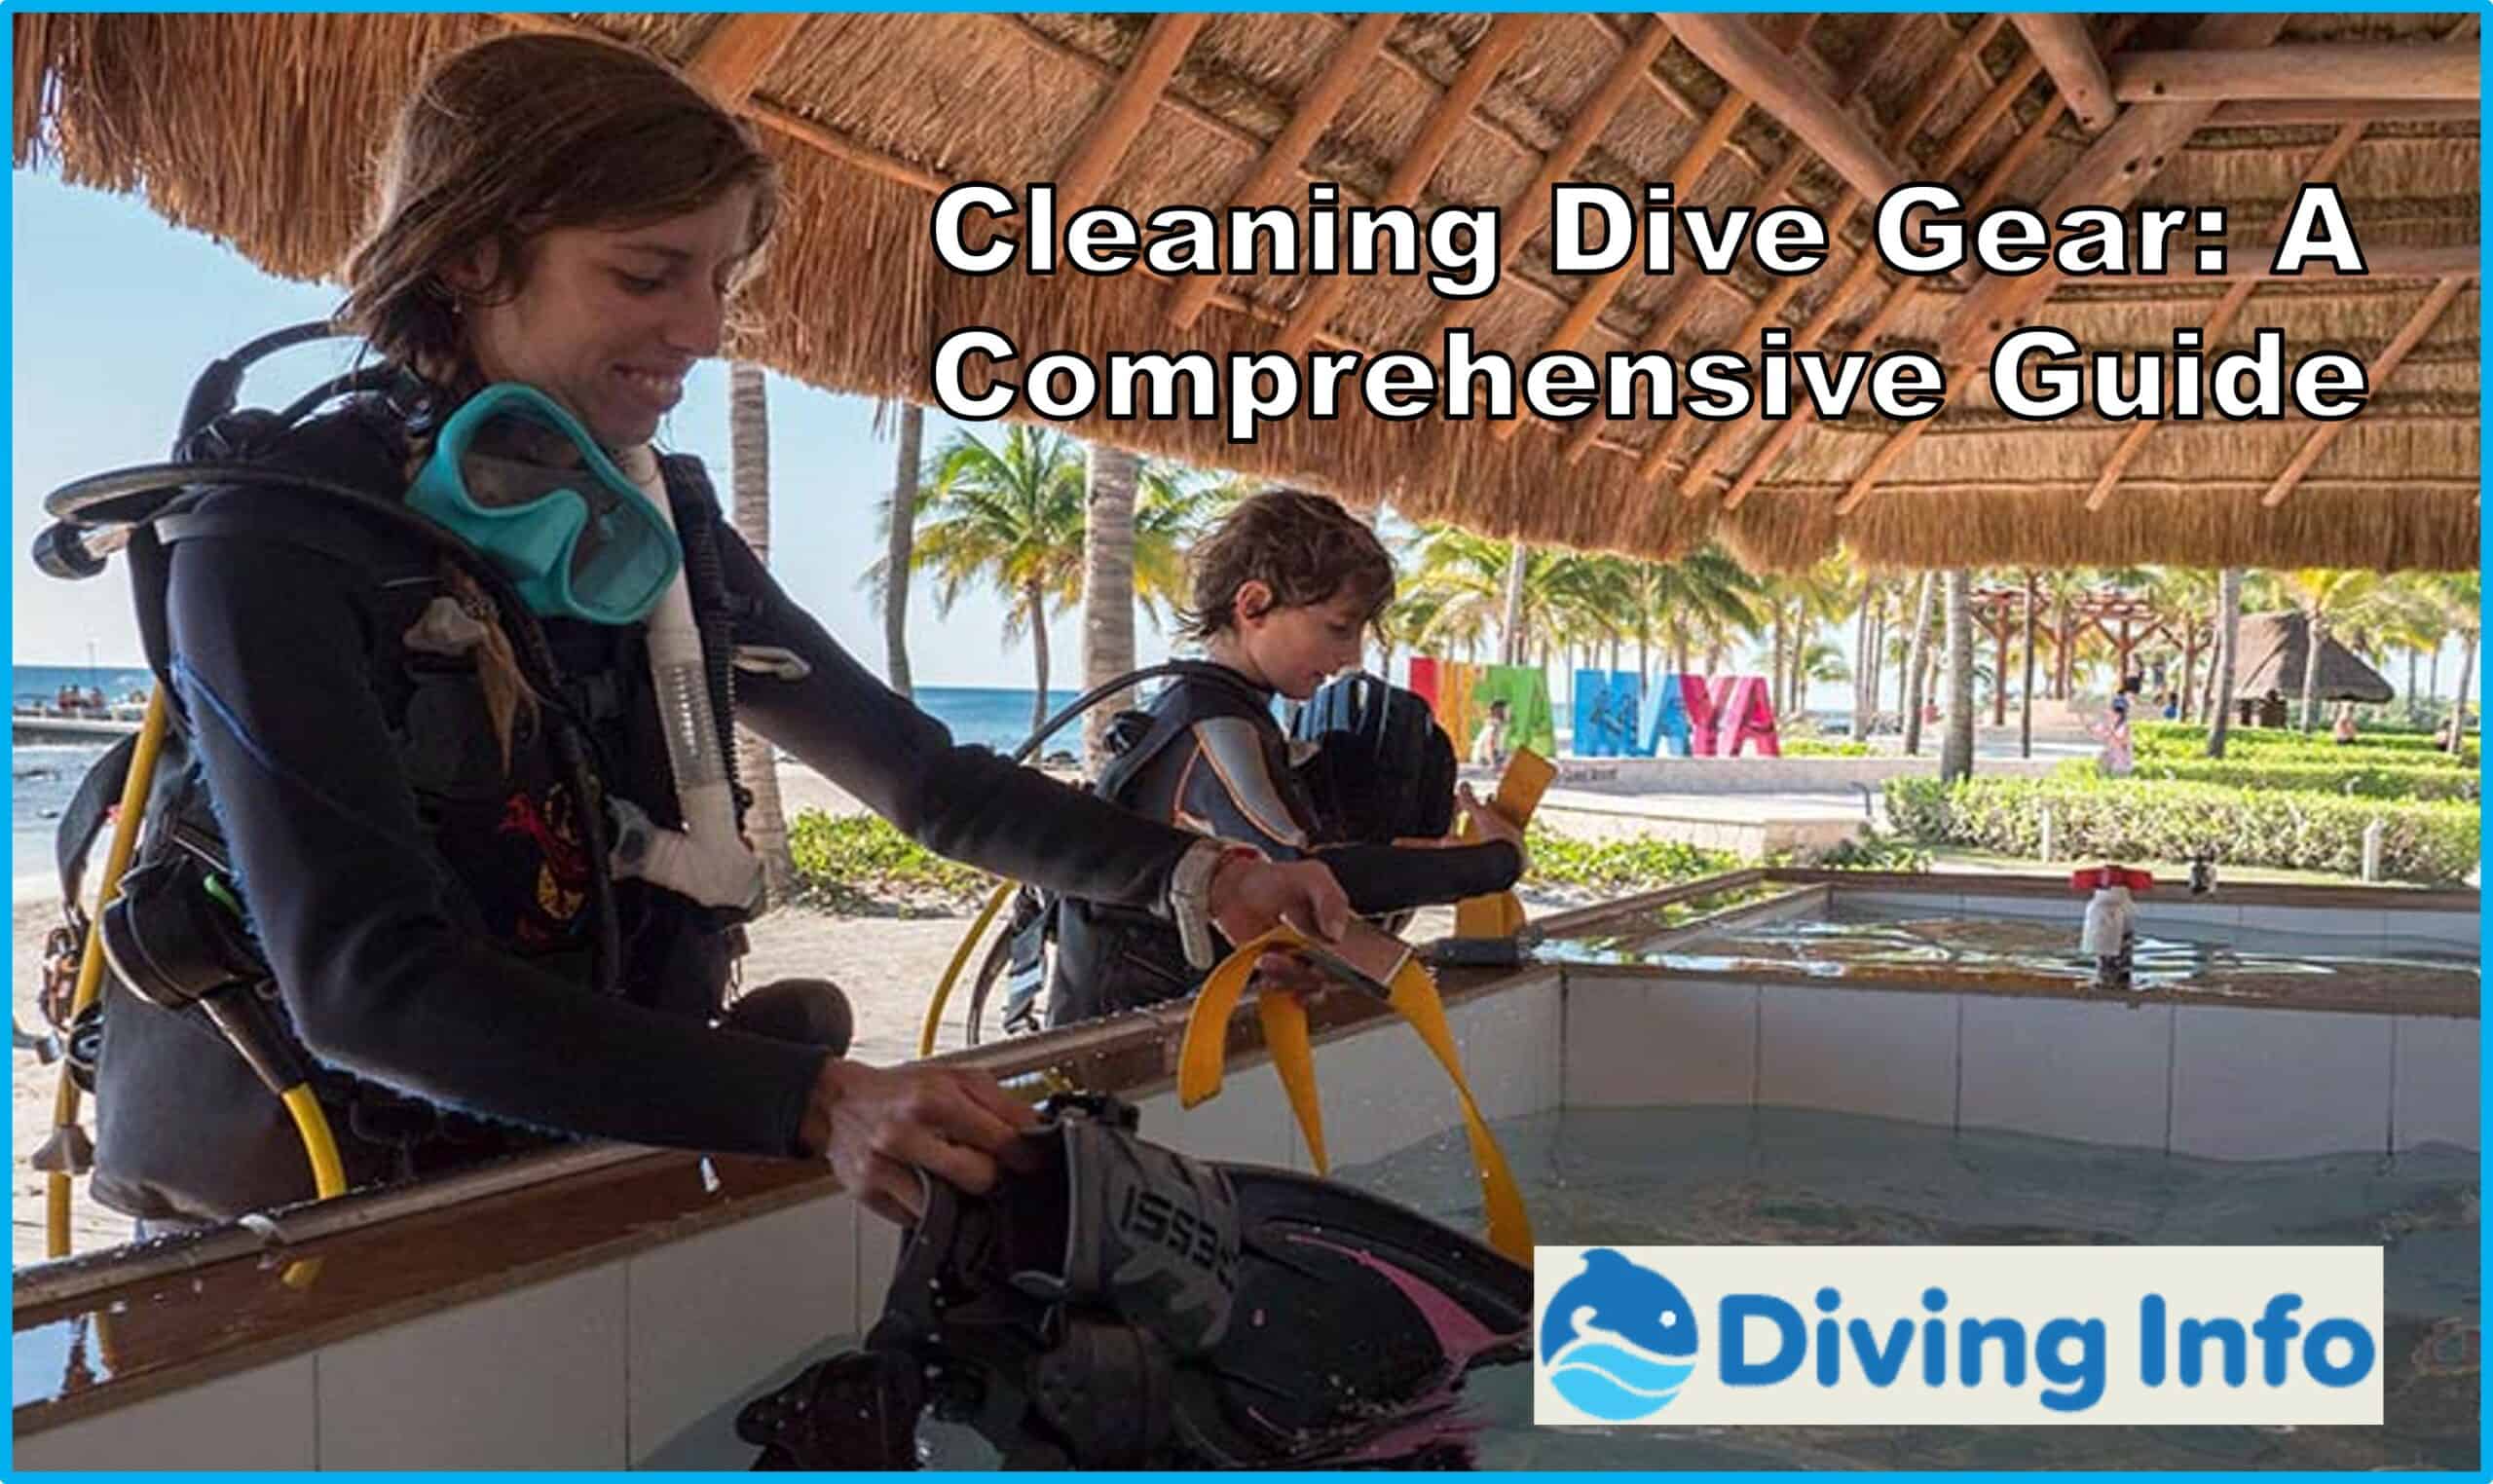
Cleaning dive gear involves rinsing all equipment with fresh water after each dive, using mild disinfectants for sanitization, and drying thoroughly before storage. Regular maintenance enhances gear longevity and diver safety.
In this article, we’ll dive deep into the world of dive gear maintenance. We’ll explore the enemies of dive gear, the cleaning process, disinfection and sanitization, special considerations, storage and maintenance, what to avoid, and the role of dive gear in diver safety.
So, let’s dive in and learn how to keep your gear in top shape for your next underwater adventure.
Key Takeaways
| Salt water and sun exposure are the main enemies of dive gear. |
| Cleaning dive gear involves rinsing with fresh water, using mild disinfectants, and drying thoroughly. |
| Special care is needed for zippers, valves, buttons, and overlapping parts. |
| Dive gear should be stored in a cool, dry place away from direct sunlight. |
| Regular inspection and professional servicing are essential for maintaining gear performance and diver safety. |
| Avoid using harsh chemicals or abrasive materials when cleaning dive gear. |
| Clean and well-maintained gear enhances diver safety and extends equipment lifespan. |
Enemies of Dive Gear
The effects of salt water on dive gear
Salt water is a major enemy of dive gear. It can cause corrosion, especially on metal parts, and can lead to the degradation of rubber and plastic components. It’s crucial to rinse your gear thoroughly with fresh water after every dive to remove salt residues.
The impact of sun exposure on dive gear
Sunlight can cause dive gear to fade and become brittle over time, especially neoprene and rubber parts. Always store your gear in a cool, dark place when not in use to minimize sun damage.
Check out this great video on how to clean and care for your gear.
How to Clean Your Dive Gear
Pre-cleaning considerations
Before you start cleaning your dive gear, make sure to disassemble it as much as possible. This will allow you to clean each part thoroughly and check for any signs of damage or wear.
Step-by-step guide to cleaning dive gear
Cleaning your dive gear involves several steps, each tailored to a specific piece of equipment. Here’s a general guide:
- Regulators: Rinse with fresh water, making sure to cover all parts. Avoid pressing the purge button while rinsing to prevent water from entering the system.
- BCDs: Rinse the exterior with fresh water. To clean the interior, fill it with fresh water, inflate it, shake it, and then empty it.
- Dive Suits and Fins: Rinse thoroughly with fresh water. For a deep clean, soak in warm water with a mild detergent, then rinse and dry.
- Dive Computers: Wipe the screen with a soft cloth and fresh water. Avoid using chemicals that could damage the screen.
Step-by-step guide to cleaning regulator
To clean your regulator, follow these steps.
- Disassemble the Regulator: Start by detaching the regulator from the tank and the BCD. Remove the mouthpiece and any other removable parts according to the manufacturer’s instructions.
- Rinse with Fresh Water: Rinse the regulator thoroughly with fresh water. Make sure to rinse the first stage, second stage, and the hoses. Be careful not to press the purge button while rinsing to prevent water from entering the system.
- Soak in Warm Water: Fill a basin with warm water and submerge the regulator for about 20 minutes. This will help to dissolve any salt or mineral deposits.
- Clean with a Soft Brush: Use a soft brush to gently scrub the regulator, paying special attention to the metal parts and any areas where salt or sand may have accumulated.
- Rinse Again: After scrubbing, rinse the regulator again with fresh water to remove any loosened debris.
- Dry Properly: Shake off excess water and hang the regulator in a well-ventilated area to dry. Make sure it’s out of direct sunlight and away from heat sources.
- Inspect for Damage: Once the regulator is dry, inspect it for any signs of wear or damage. Check the hoses for cracks and the metal parts for corrosion.
- Store Properly: Store the regulator in a cool, dry place. Avoid hanging it by the hoses as this can cause stress and damage over time.
- Schedule Regular Servicing: Even with regular cleaning, it’s important to have your regulator serviced by a professional at least once a year to ensure it’s in top working condition.
Step-by-step guide to cleaning BCD
Here is my step-by-step guide for cleaning a buoyancy compensator device.
- Detach the BCD: Start by disconnecting the BCD from the tank and the regulator. Remove any removable parts according to the manufacturer’s instructions.
- Rinse the Exterior: Rinse the exterior of the BCD thoroughly with fresh water. Pay special attention to the inflator and deflator mechanisms, as well as any pockets or zippers.
- Clean the Interior: To clean the interior, fill the BCD with warm water through the oral inflator. Inflate the BCD halfway, shake it to allow the water to reach all parts of the interior, then drain the water through the dump valves.
- Repeat the Interior Cleaning: Repeat the interior cleaning process a couple of times to ensure all salt and debris are removed.
- Rinse Again: After cleaning the interior, give the BCD another thorough rinse on the outside to remove any loosened debris.
- Inflate and Dry: Inflate the BCD halfway and allow it to dry in a well-ventilated area, away from direct sunlight. This helps to prevent the growth of mold and mildew inside the BCD.
- Inspect for Damage: Once the BCD is dry, inspect it for any signs of wear or damage. Check the inflator and deflator mechanisms for proper operation, and inspect the bladder for leaks.
- Store Properly: Store the BCD in a cool, dry place. Avoid hanging it by the straps as this can cause stress and damage over time.
Step-by-step guide to cleaning wetsuit
- Rinse the Wetsuit: After your dive, rinse your wetsuit thoroughly with fresh water. This helps to remove salt, sand, and other debris from the surface.
- Prepare a Soak: Fill a tub with warm water and a wetsuit-specific cleaner. Avoid using harsh detergents or bleach, as these can damage the neoprene material.
- Soak the Wetsuit: Submerge your wetsuit in the prepared soak. Allow it to sit for about 15-20 minutes to dissolve any residual salt or minerals.
- Scrub Gently: Using a soft brush or a sponge, gently scrub the wetsuit, paying special attention to areas like the zippers and underarms where dirt and oils can accumulate.
- Rinse Again: After scrubbing, rinse the wetsuit again with fresh water to remove any loosened debris and soap.
- Dry Properly: Hang the wetsuit inside out in a well-ventilated area out of direct sunlight to dry. Avoid using heat sources like radiators or hair dryers, as these can damage the neoprene.
- Inspect for Damage: Once the wetsuit is dry, inspect it for any signs of wear or damage. Check for any tears or loose seams that may need repair.
- Store Properly: Store the wetsuit flat or hang it on a wide hanger to prevent creases. Avoid folding the wetsuit or storing it under heavy items, as this can cause permanent creases and damage the neoprene.
Step-by-step guide to cleaning fins
Here are my recommendations for cleaning your dive fins.
- Rinse the Fins: After your dive, rinse your fins thoroughly with fresh water. This helps to remove salt, sand, and other debris from the surface.
- Prepare a Soak: Fill a tub with warm water and a mild detergent. Avoid using harsh chemicals, as these can damage the material of the fins.
- Soak the Fins: Submerge your fins in the prepared soak. Allow them to sit for about 15-20 minutes to dissolve any residual salt or minerals.
- Scrub Gently: Using a soft brush or a sponge, gently scrub the fins, paying special attention to the foot pockets and straps where dirt and oils can accumulate.
- Rinse Again: After scrubbing, rinse the fins again with fresh water to remove any loosened debris and soap.
- Dry Properly: Lay the fins flat in a well-ventilated area out of direct sunlight to dry. Avoid hanging the fins by the straps, as this can cause stress and damage over time.
- Inspect for Damage: Once the fins are dry, inspect them for any signs of wear or damage. Check for any cracks or tears that may need repair.
- Store Properly: Store the fins flat or hang them by the foot pocket to prevent warping. Avoid storing them under heavy items, as this can cause deformation.
Step-by-step guide to cleaning dive computer
- Rinse the Dive Computer: After your dive, rinse your dive computer thoroughly with fresh water. This helps to remove salt, sand, and other debris from the surface.
- Soak the Dive Computer: Submerge your dive computer in warm water that has a mild cleaning solution. Allow it to sit for about 15-20 minutes to dissolve any residual salt or minerals.
- Wipe Gently: Using a soft cloth, gently wipe the dive computer, paying special attention to the screen and buttons where dirt and oils can accumulate.
- Rinse Again: After wiping, rinse the dive computer again with fresh water to remove any loosened debris.
- Dry Properly: Pat the dive computer dry with a soft towel and then let it air dry in a well-ventilated area out of direct sunlight.
- Inspect for Damage: Once the dive computer is dry, inspect it for any signs of wear or damage. Check the screen for any cracks and ensure the buttons are functioning properly.
- Store Properly: Store the dive computer in a cool, dry place. Avoid storing it under heavy items, as this can cause damage.
- Schedule Regular Servicing: If your dive computer has significant cracks or the buttons are not functioning properly, consider having it serviced by a professional.
The role of freshwater in cleaning scuba equipment
Fresh water is the best and safest cleaning agent for your dive gear. It helps remove salt, sand, and other debris that can damage your equipment over time.
Disinfection and Sanitization
Why disinfection is necessary
Disinfection is crucial to remove any bacteria or microorganisms that may have settled on your gear. This is especially important for parts that come into contact with your mouth or eyes, like regulators and masks.
Safe and effective disinfectants for scuba gear
Use a mild disinfectant solution for your dive gear. Some divers prefer to use a mixture of water and vinegar, while others use commercially available dive gear disinfectants. Always rinse thoroughly after disinfecting to remove any residue.
Using vinegar to clean your equipment
Vinegar is a safe and effective solution for cleaning scuba gear. It’s a mild, natural acid that can help remove salt and mineral deposits from your equipment.
To use vinegar for cleaning, create a solution of equal parts white vinegar and fresh water. Submerge your gear in this solution, then gently scrub to remove any residue. Rinse thoroughly with fresh water afterwards to ensure no vinegar remains.
Remember, while vinegar is great for general cleaning, it may not be sufficient for disinfecting, so consider using a specialized dive gear disinfectant for a thorough clean.
Using commercial disinfectants and cleaning solutions
Commercially available dive gear disinfectants, such as McNett’s MiraZyme Odor Eliminator, are specifically designed to clean and deodorize scuba gear.
MiraZyme is a biodegradable, chlorine-free solution that penetrates into the pores of fabric, rubber, and even hard surfaces to eliminate odor-causing bacteria and fungi. It’s easy to use, simply mix with water and soak your gear.
The benefits of using a product like MiraZyme include its effectiveness in removing odors and its environmental friendliness. However, a potential drawback is the cost, as it’s more expensive than homemade cleaning solutions like vinegar and water.
Additionally, while it’s excellent for deodorizing, it may not remove all types of bacteria, so a thorough rinse with fresh water is still necessary.
Special Considerations
Scuba gear is different than your clothing and other sports equipment. The following table lists my top recommendations for cleaning and maintaining your dive gear.
| Components | Enhanced Cleaning and Maintenance Strategies |
| Zippers | To ensure the smooth operation of zippers, they should be rinsed with fresh water and treated with a specialized zipper lubricant on a regular basis. |
| Valves and Buttons | To avoid damage, valves and buttons require meticulous cleaning. Utilize a soft brush to dislodge any debris and follow up with a thorough rinse using fresh water. |
| Overlapping Parts | Parts that overlap can accumulate water and debris, potentially leading to the growth of mold and mildew. It’s crucial to disassemble and meticulously clean these areas. |
Cleaning and maintenance of zippers
Zippers need special care to keep them functioning smoothly. Rinse them with fresh water and apply a zipper lubricant regularly.
Cleaning and maintenance of valves and buttons
Valves and buttons should be cleaned carefully to prevent damage. Use a soft brush to remove any debris and rinse with fresh water.
Cleaning and maintenance of overlapping parts
Overlapping parts can trap water and debris, leading to mold and mildew. Make sure to separate and clean these parts thoroughly.
Storage and Maintenance
Your dive gear is a major investment. Here are my strategies for storing and maintaining your equipment.
| Storage and Maintenance Aspects | Optimized Strategies |
| Drying Techniques for Diving Equipment | To inhibit the growth of mold and mildew, it’s essential to dry your gear properly. Position your equipment in a well-ventilated area, shielded from direct sunlight, ensuring all components are thoroughly dry prior to storage. |
| Ideal Conditions for Storing Dive Gear | Your dive gear should be stored in a cool, dry environment, away from direct sunlight. Locations with high humidity or extreme temperatures should be avoided. |
| Regular Maintenance and Inspection | It’s important to routinely check your gear for any indications of wear or damage. Enlist the services of a professional for an annual servicing to maintain optimal gear condition. |
Proper drying techniques for diving equipment
Proper drying is crucial to prevent the growth of mold and mildew. Hang your gear in a well-ventilated area out of direct sunlight. Make sure all parts are completely dry before storing.
Ideal storage conditions for dive gear
Store your dive gear in a cool, dry place away from direct sunlight. Avoid storing gear in places with high humidity or extreme temperatures.
Regular Maintenance and Inspection
Regularly inspect your gear for any signs of wear or damage. Get your gear serviced by a professional at least once a year to ensure it’s in top condition.
What to Avoid
Harmful chemicals and substances
Avoid using harsh chemicals or abrasive materials when cleaning your dive gear. These can cause damage and shorten the lifespan of your equipment.
Common mistakes in cleaning and storing dive gGear
Common mistakes include:
- not rinsing gear thoroughly
- storing gear while still wet
- not inspecting gear regularly
Avoid these mistakes to keep your gear in top shape.
The Role of Dive Gear in Diver Safety
How clean and well-maintained gear enhances safety
Clean and well-maintained gear not only lasts longer but also performs better. This can enhance your safety by ensuring your gear functions properly when you need it most.
The risks of using poorly maintained gear
Using poorly maintained gear can lead to equipment failure, which can be dangerous or even life-threatening during a dive. Regular cleaning and maintenance can help prevent these risks.
Conclusion
Cleaning dive gear is not just about maintaining its appearance; it’s about ensuring its performance and your safety. By following the guidelines in this article, you can keep your gear in top condition and enjoy many safe and exciting dives. So remember, after every dive, take the time to clean your gear. It’s an investment in your safety and the longevity of your equipment. Happy diving!